Major Project - Final Year Project
04.04.2023 - 10.07.2023 (Week 1 - Week 15)
INSTRUCTIONS


Feedback


Jocelin Agustia (0345436)
Major Project - Bachelor of Design (Hons) in Creative Media
Final Year Project

INSTRUCTIONS
Module Information Booklet
It is finally the last semester! Our first class was only a briefing on what major project is about and in the class we were shown our seniors' work. We had the chance to see and touch the final outcomes of the project. I had the chance to experience the seniors' final year exhibition last year and I was amazed by all the hard work they give in.
We needed to present our ideas to Mr. Asrizal and have him approve of them first before being assigned to our lecturer. We were given time for around 2 weeks until the third week. We were given options to either use our dissertation, UNSDG or create a whole new idea. Below is my first proposal.
figure 1.1 First Proposal
I wanted to go with my dissertation at first, but during my first consultation with Sir Asrizal, he told me that I should find a new idea because I have been using a Chinese theme for many times and it would not look great on my portfolio later. He told me that there will be no variety in my portfolio later. After some thought, I agree with what he said and started to search for new ideas instead.
figure 1.2 Second Proposal
In the second week, I propose another Idea which is about Philippine myths and legends, and turn it into an Artbook. After the discussion, he finally approved my idea and I was able to be assigned to my lecturer so I could start working on it.
IDEATION
I had my first meeting with my assigned lecturer, Sir Kannan. The first meeting was only a brief to set me in the right direction. Since Sir Kannan was still not aware of what my idea was, I told him what my idea was and about the outcome of the art book that I wanted. At the end of the meeting, he told me to ideate the characters and also to start with the silhouettes.
In our next consultation session, I showed him my progression and we also talked about how many characters I should have and what other outcomes I must have. I told him that I am not sure I could do 5 characters because I know I am slow, but Sir suggested that I should try first. He also told me to make either 3D sculpting or animation, it is to show what I am capable of other than just illustrations.
My progression for this week was not a lot because I was still in the stage of researching the characters. I managed to do silhouettes of my first protagonist, Mayari.

figure 1.3 Mayari Silhouettes Part 1
Feedback
- The idea is fine but it does not look like cyberpunk and it does not depict her status as a Deity or princess.
- For your animation, you can take a reference on the DOTA character introduction.
- Fix your project timeline to be more precise
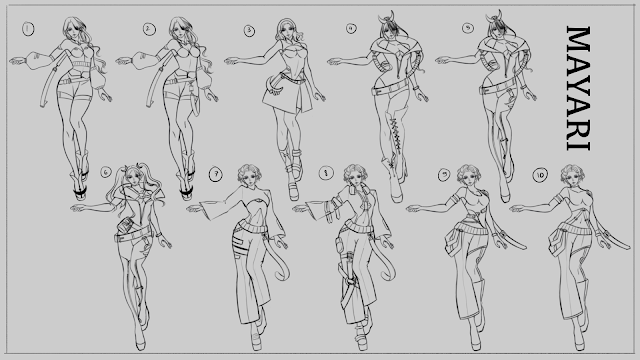
I showed him more of my silhouettes, this time I have 3 characters. 2 protagonists (Mayari and Apolaki) and 1 villain (Bakunawa). I also sketched Mayari's and Apolaki's weapons. Below are the silhouettes.

figure 1.4 Mayari Silhouettes Part 2
Feedback- Her status is still now showing, but you can use design on number 1 and 8 for your guide
- You can check on Arcane's website and look at the royal character there, a royal should have that kind of 'royal' aura on them
- Number 4 and 5 is a no because the headpiece makes her devilish

figure 1.5 Apolaki Silhouettes
Feedback
- For his design, you can go with number 5, 8, or 9 for your guide because it depicts more of his personality

figure 1.6 Bakunawa Silhouettes
Feedback
- You need to continue and develop him more. As of now, it does not look that impressive

figure 1.7 Apolaki Weapon Design
Feedback
- I can see what your idea is, you need to look back at your weapon references because the handle should not be that thin and the blades of the weapon can be fixed or better

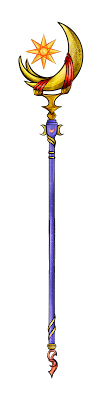
figure 1.8 Mayari Weapon Design
Feedback
- Same as the feedback for Apolaki's weapon, the handle of the scepter shouldn't be that thin
- It would be better if the pendant have a more fancy design
General feedback
Sir Kannan suggested I have some of the character's power or skill when presenting their design so that viewers can understand what type of character they are and also to know the environments.
DESIGN DEVELOPMENT
The only accepted initial design was for Apolaki, so I still have a lot to do. So my next focus is to continue developing the other 2 characters and finalize the final look of Apolaki. I also started to design Mayari's power or skills.

figure 1.9 Mayari Design Development

figure 2.1 Mayari Turn Around

figure 2.2 Mayari Powers
- The weapon is all good, but for the character's clothing, you can try changing her pants into skirts because as of right now the royal vibe is still not there. There is no need to be skirts too, you can keep them as pants but work on the vibe.

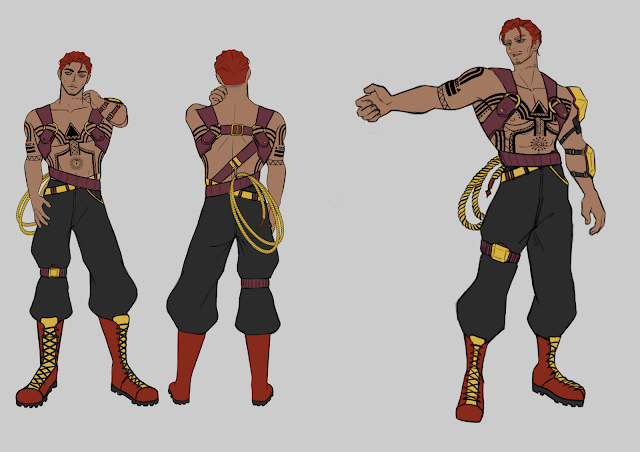
figure 2.3 Apolaki Design Development
Feedback
- You can move forward to the color variety for Apolaki

figure 2.4 Bakunawa Design Development
Feedback
- Maybe you can make the part behind his head bigger
- Do not draw the torso like that. don't give that kind of lines on his body, refer back to your anatomy lessons
- The look of the hands is also wrong, it should not look like that
- You need to follow the line of the curves, so the belly (the snake body) should follow that line
General Feedback
Although I haven't started with my environment design, Sir Kannan suggested I search for references for abandoned underwater remains to see how professionals illustrate them to have stories behind the illustration.
COLOR VARIETY
At this stage, I haven't had time to fix Mayari and Bakunawa's design but I started to give a variety of colors for every character first in order to have the gist of colors suitable for them,

figure 2.5 Mayari Color Variety 1
Feedback
- The colors don't really suit her, I suggest you search for the meaning behind the colors first so it could match her well

figure 2.6 Apolaki Color Variety 1
Feedback
- You can go with numbers 3 and 7, but I suggest using number 7's idea and changing his shoe and hair color with number 3 colors.
- Don't use yellow color on his tattoo because it blends with his skin color

figure 2.7 Bakunawa Color Variety 1
Feedback
- The current colors chosen do not really fit him. Try putting blue and searching for colors that represent wickedness and greed.
There is a lot that needs to be fixed and I became quite stressed out, but I need to move forward fast so I pushed myself even harder. I ended up creating a new design for Mayari and Bakunawa,

figure 2.8 Mayari Final Design

figure 2.9 Mayari Color Variety 2
For the colors, I ended up going for number 3 because I think it depicts royalty more than the others.

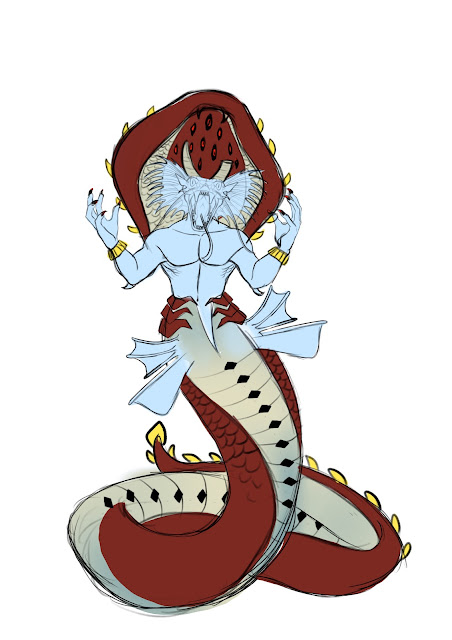
figure 3.1 Bakunawa Final Design
I decided to change Bakunawa's design because I wanted to have him look huge, so I made his backside larger and had his hands bigger.

figure 3.2 Bakunawa Final Color
I decided to give multiple eyes on the backside of Bakunawa or else his design would look plain. The eyes behind him are also to make him look scarier. I added horns on him too, but one of them is drawn as broken to represent his fight with the protagonists.
Feedback
- Yes you can go ahead with these designs (both for Mayari and Bakunawa)
RENDERING
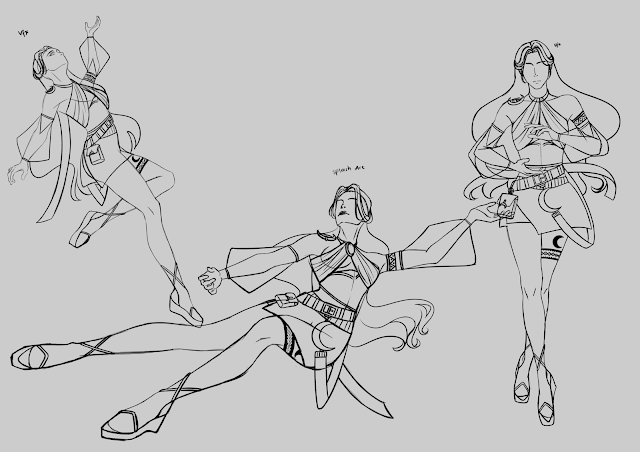
Designs for Mayari and Bakunawa are finally approved! I am so glad and happy, now I can start with their poses and color them! However, there is not much time left, so I decided to focus more on Mayari as she is the main character in my art book. I started by sketching her poses.

figure 3.3 Mayari Poses
I decided to not use the first pose for her visual effect because her face doesn't really show with that pose. After that, I started coloring Mayari's splash art pose, her weapon, and accessories, and also her turnaround. I already have Mayari's first visual effect ready so I added another one.
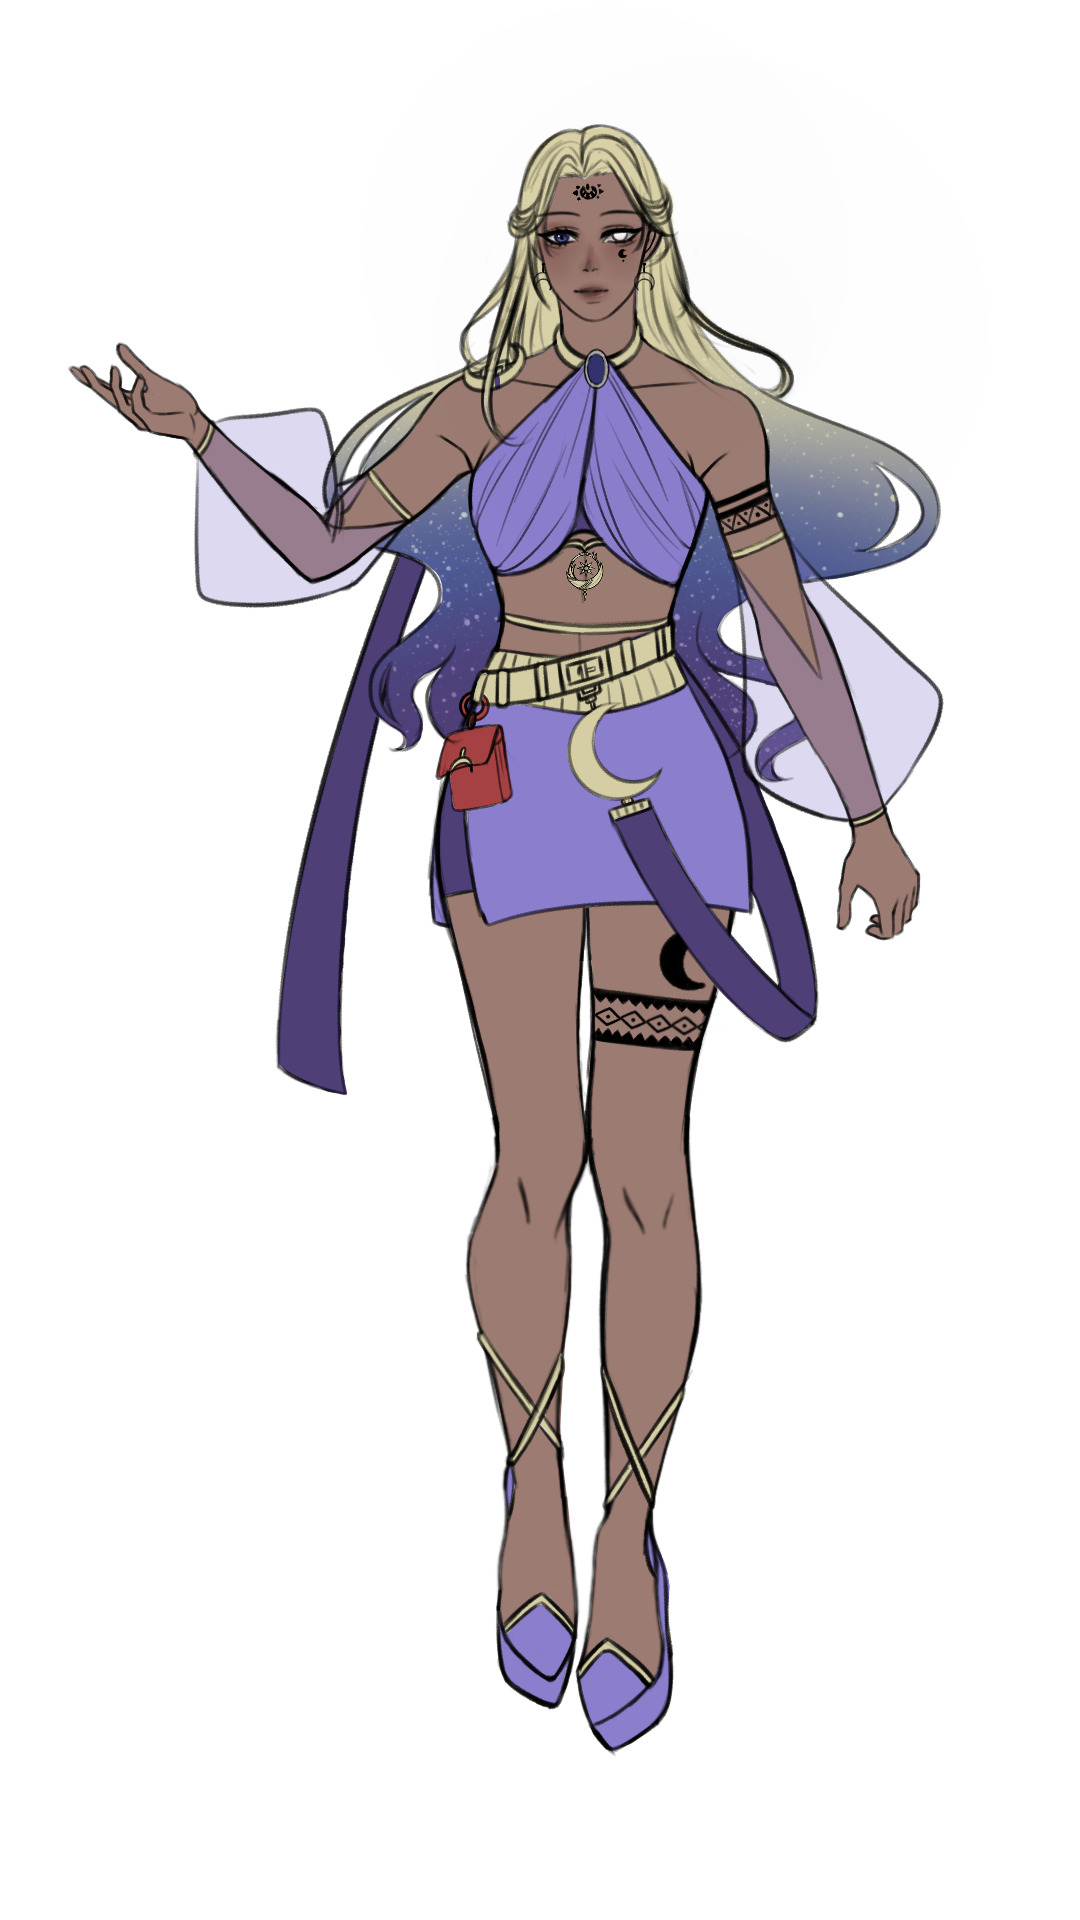

figure 3.4 Mayari's Turn Around


figure 3.5 Mayari's Weapon
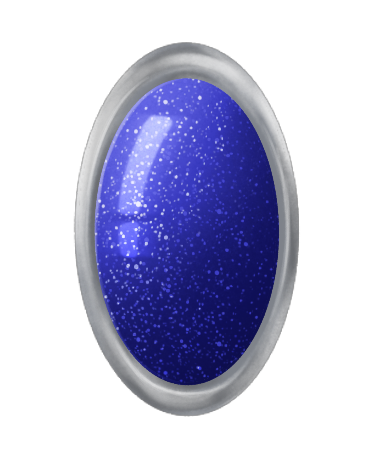


figure 3.6 Mayari's Accessories

figure 3.7 Mayari Rendered
With Mayari finished, I moved on with Apolaki.
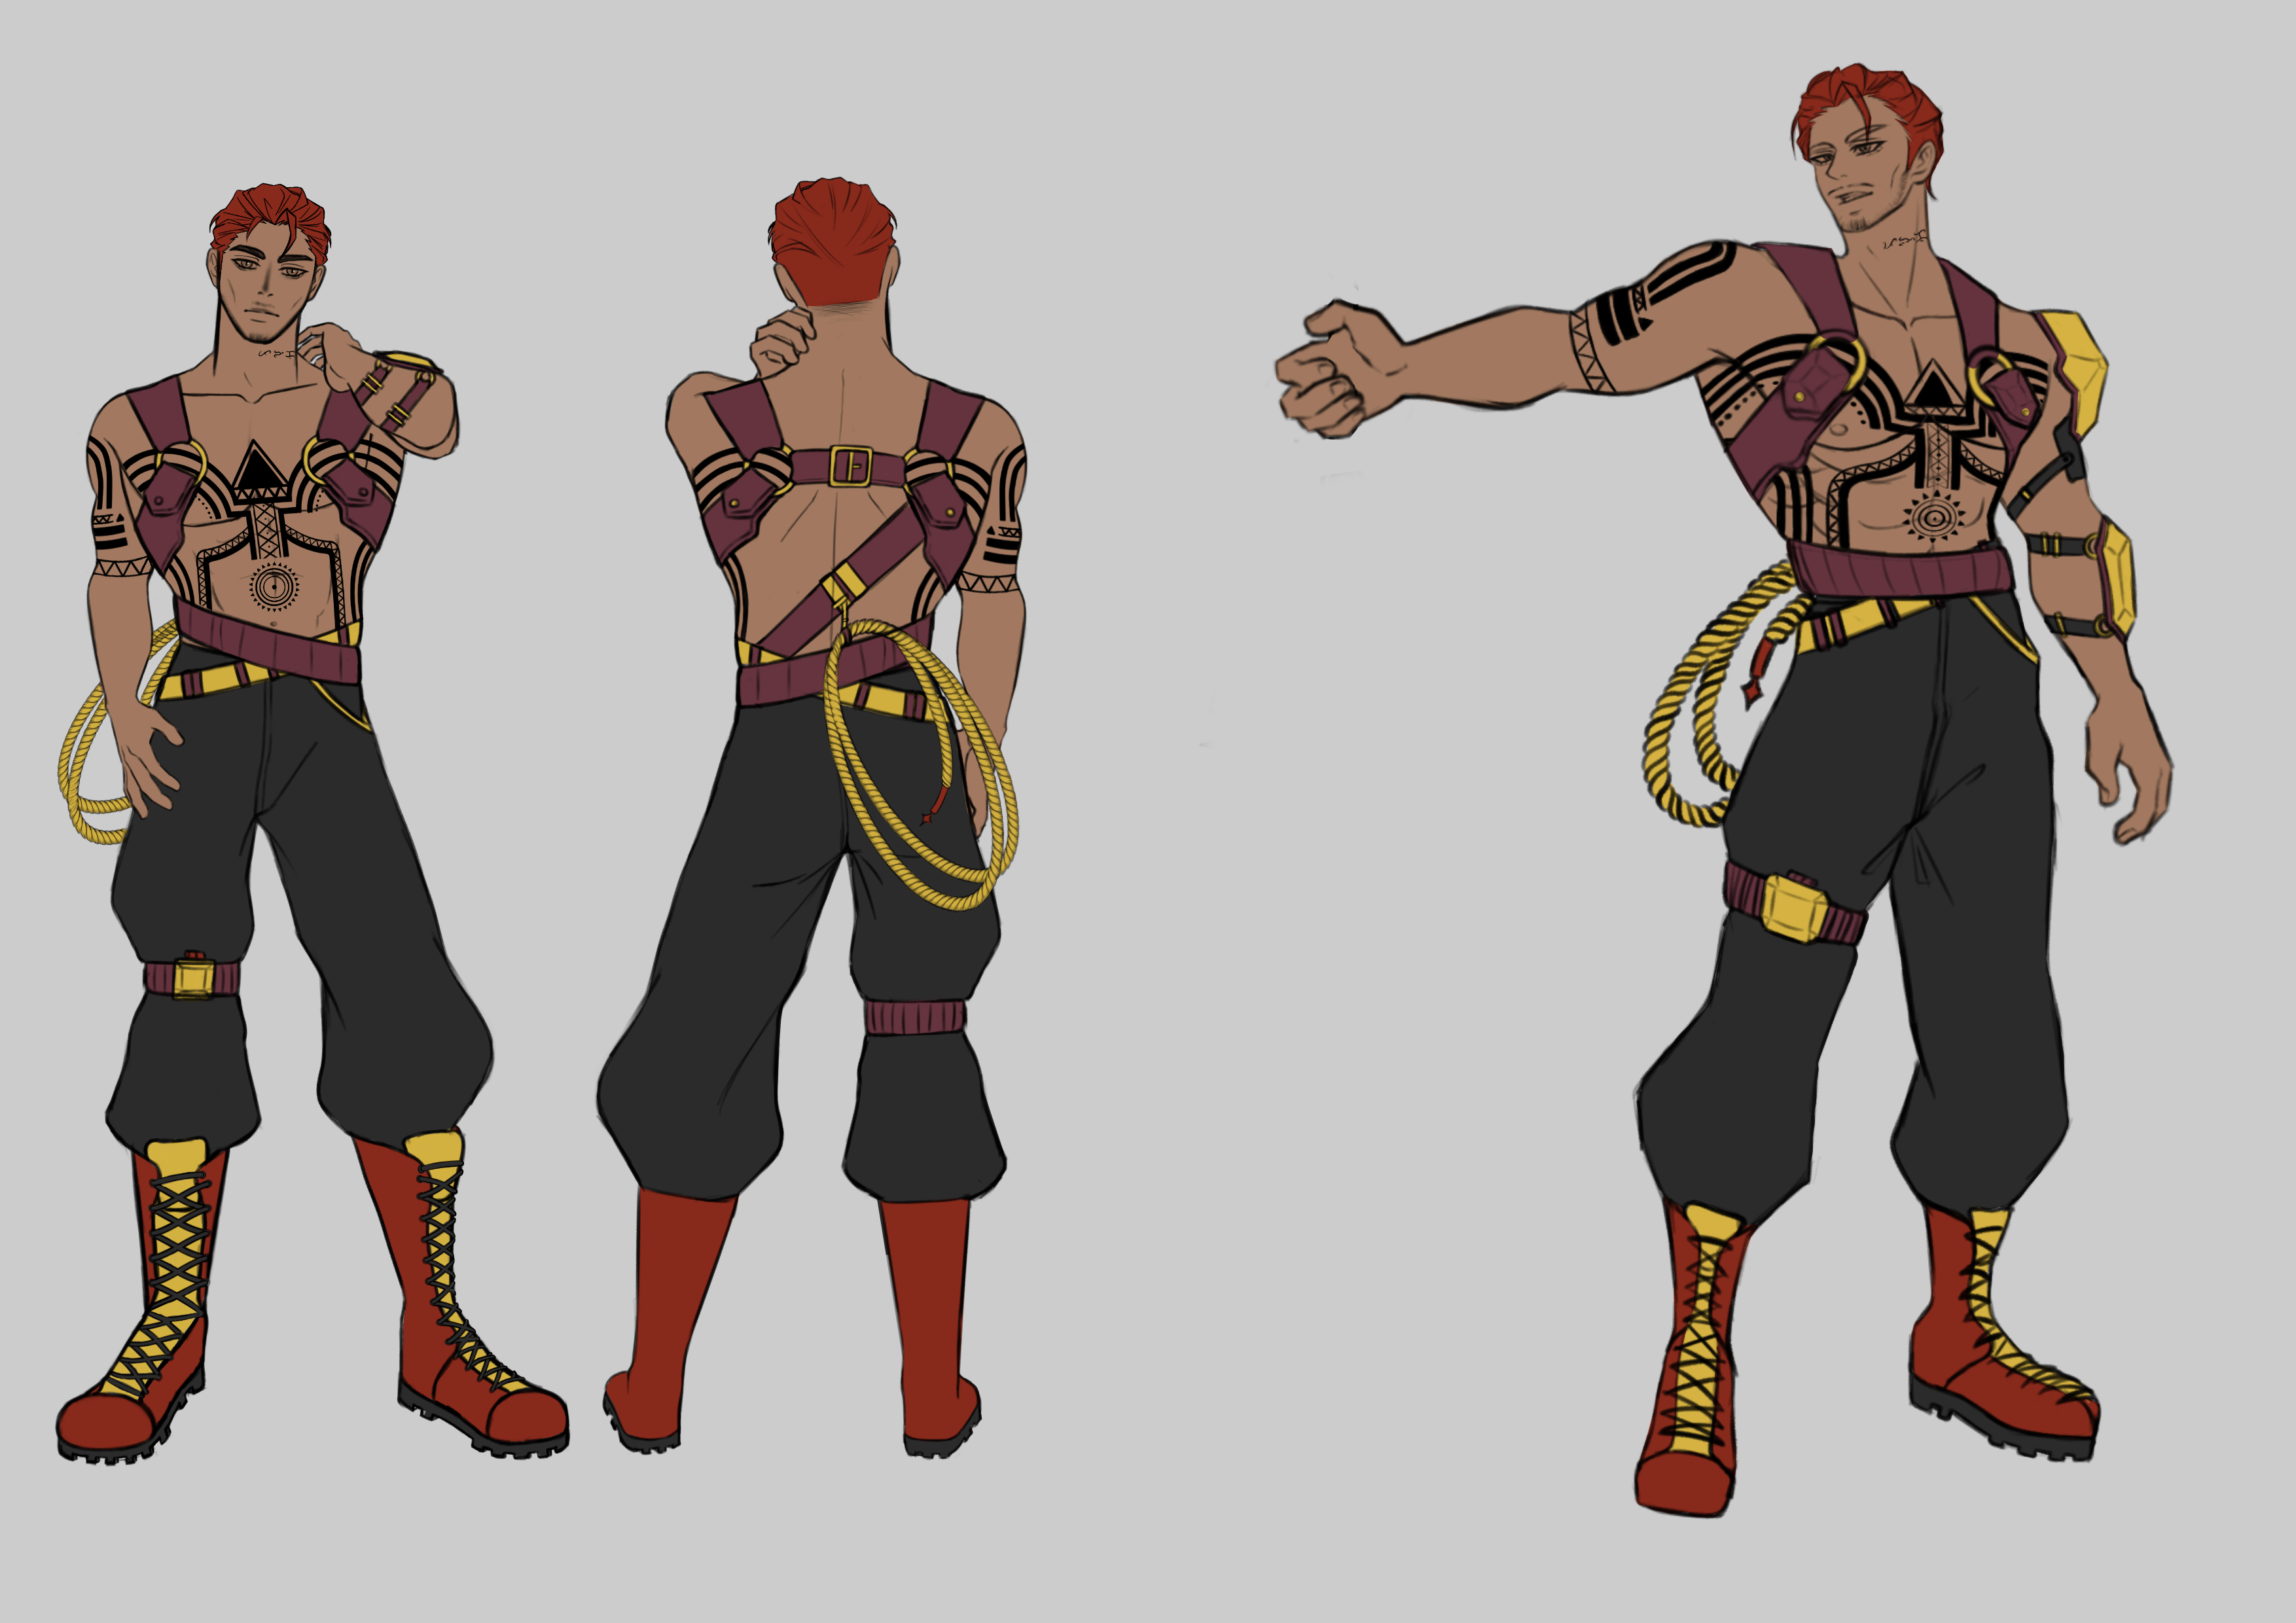
figure 2.8 Apolaki Turn Around

figure 3.9 Apolaki's Weapon

figure 4.1 Apolaki's Asset

figure 4.2 Apolaki's Pose for Splash Art
The next one to be rendered is the villain, Bakunawa! I didn't do much with Bakunawa because I am currently rushing since the deadline for this project is nearing.

figure 4.3 Bakunawa Rendered
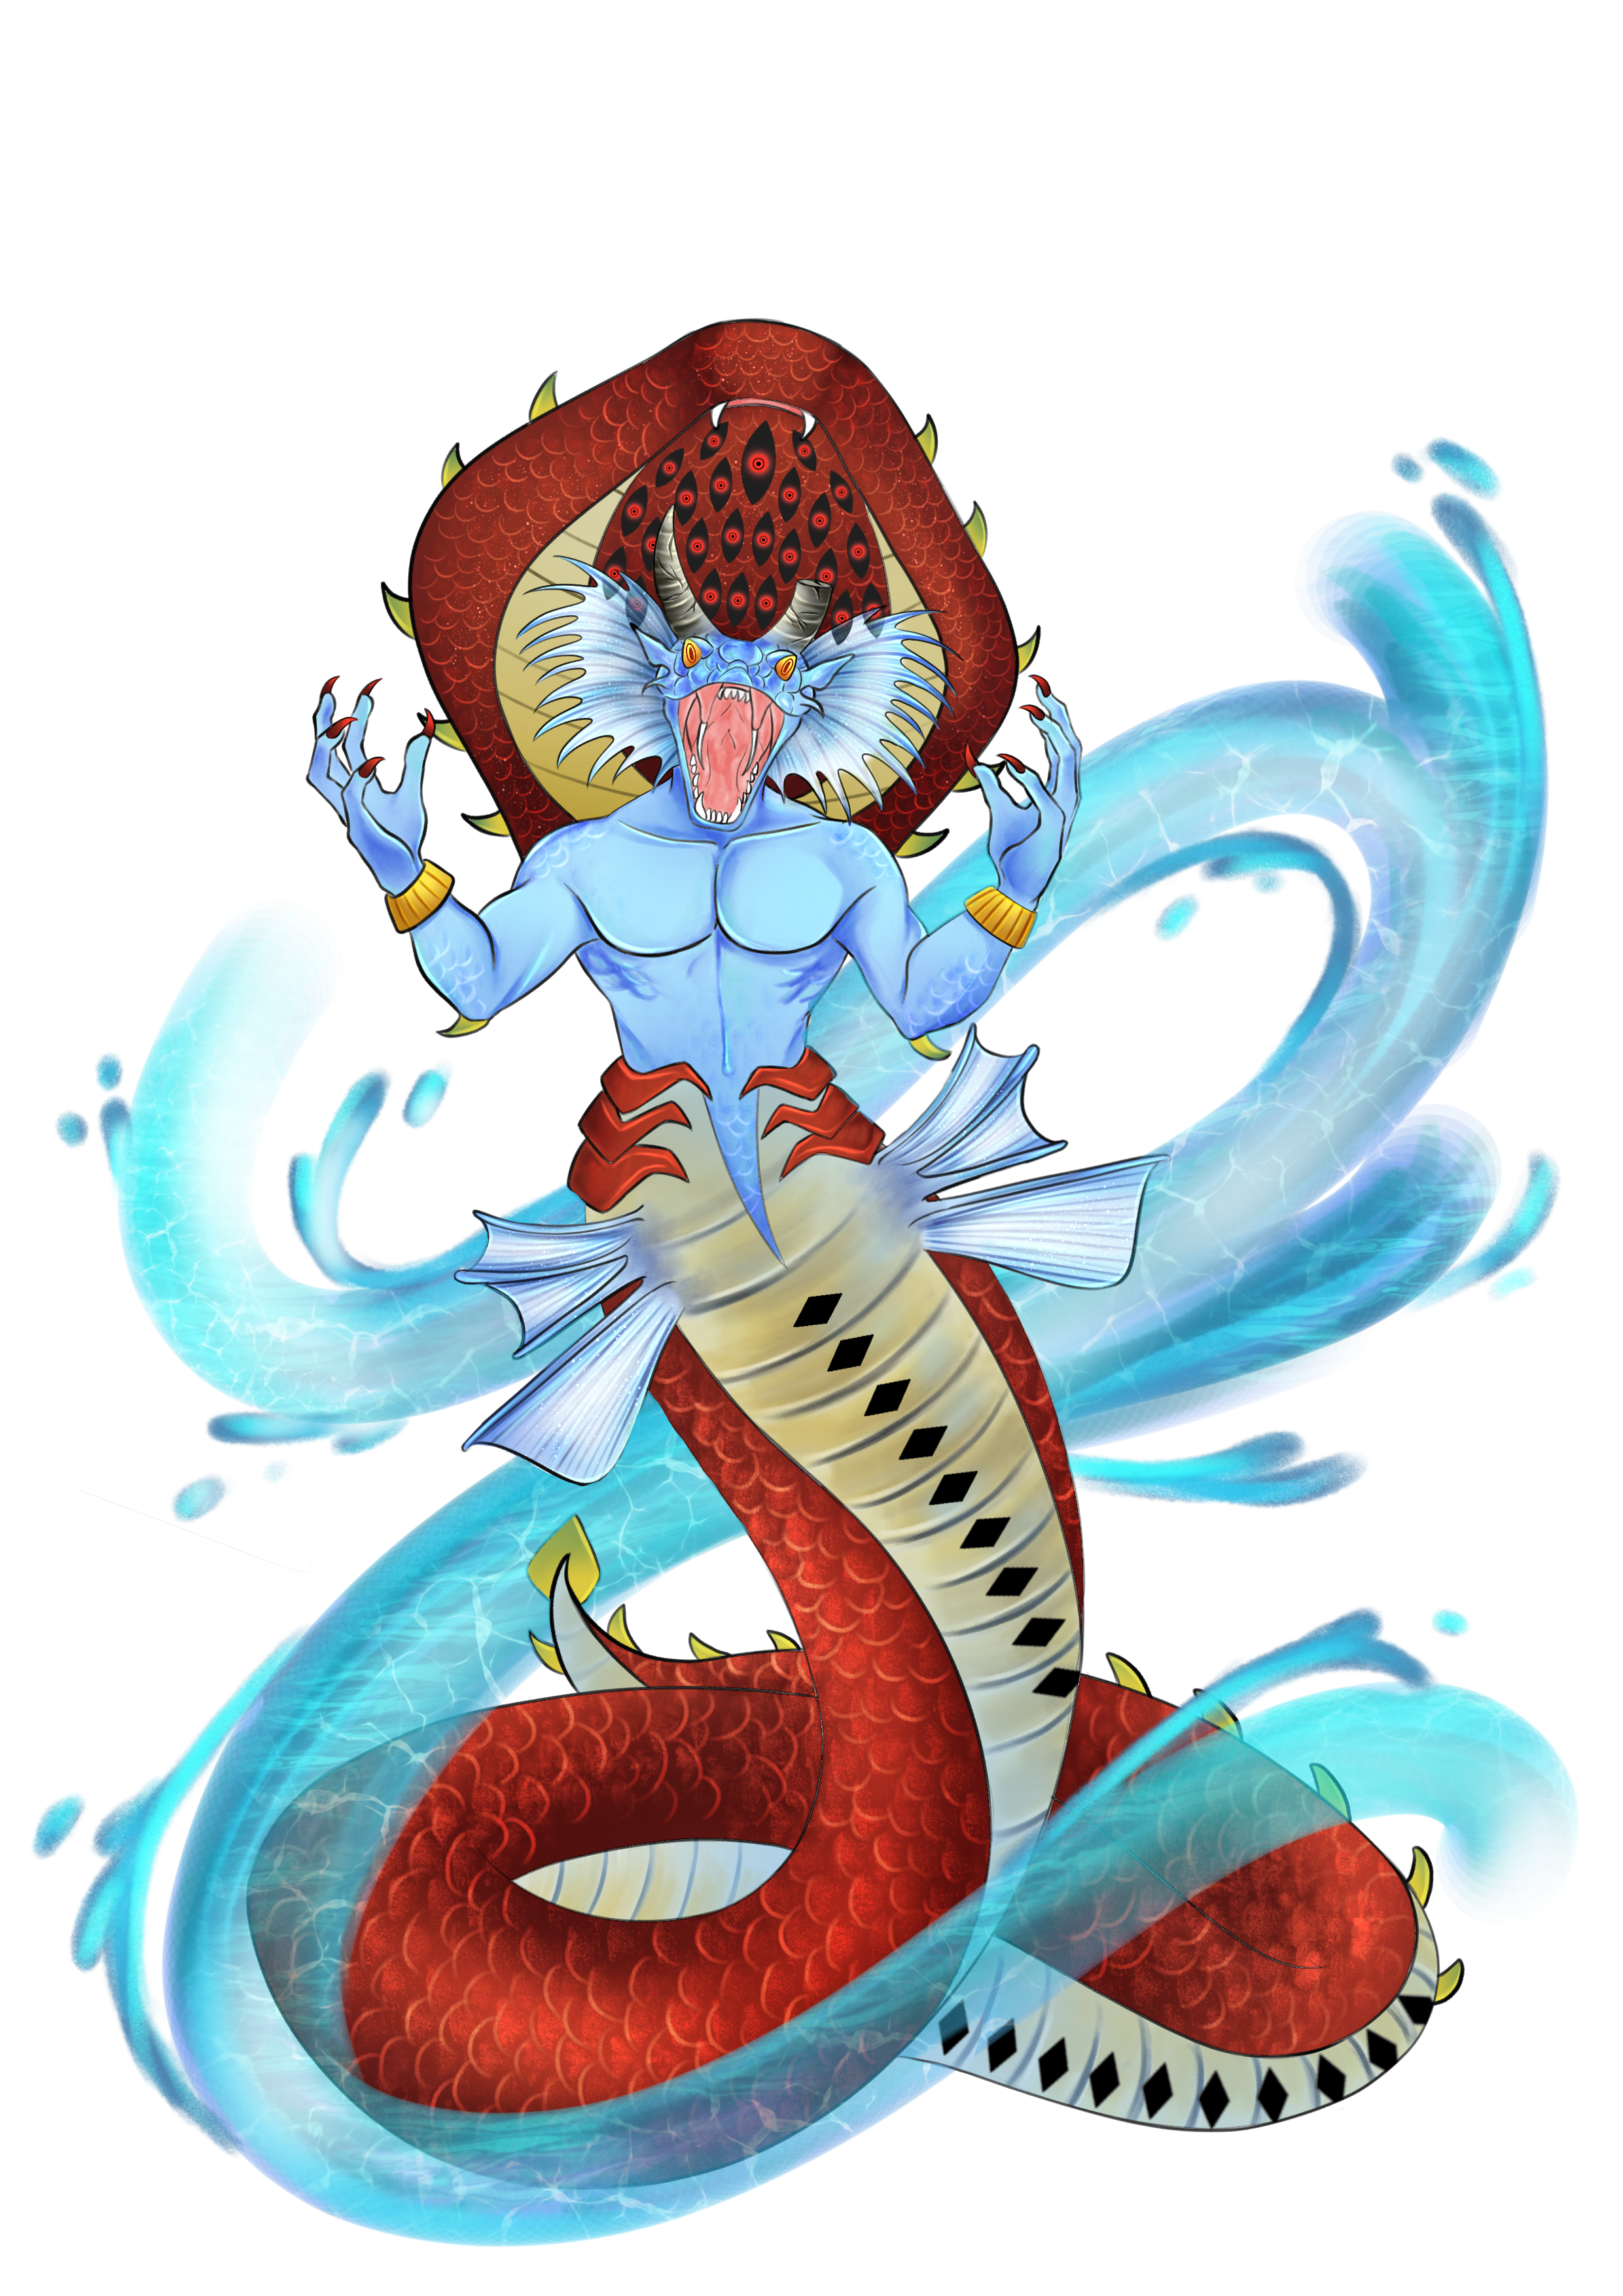
figure 4.4 Bakunawa Pose for Splash Art
Now that all the characters have been rendered, I moved on with their splash art, and below is the result.

figure 4.5 Mayari's Splash Art

figure 4.6 Apolaki's Splash Art

figure 4.7 Bakunawa's Splash Art
ENVIRONMENT
I did some quick blockouts for the environment. I decided to go with the second one.

figure 4.8 Environment First Blockout

figure 4.9 Environment Second Blockout
Below is the final result for the environment which I named "Enigma" which means mysterious. I did a bit of photo bashing for textures.

figure 5.1 Enigma
ANIMATION
I did a subtle animation for my environment, which can be viewed below.
figure 5.2 Enigma Animation_v1
I also sketched out the storyboard for Mayari's character introduction.

figure 5.3 Storyboard
It is only a short animation, after finishing her storyboard I proceeded to color it and animate it. To make the animating process easier, I separated some parts that I wanted to animate. I also added background music and scripts for the animation. Below is the result.
figure 5.4 Mayari Character Introduction Animation_v1


ARTBOOK
Finally reached the final stage, which is the creation of the Artbook! I am very excited. First of all, I made a logo for my art book in Adobe Illustrator.

figure 5.2 Logo Variation
I ended up choosing logo number 4 and incorporating it into my art book's title.

figure 5.3 Artbook's Title
Next, I illustrated the cover book. Below is the result.

figure 5.4 Book Cover Illustration
And that is all, I compiled everything into the art book!
COLLATERALS
For exhibition purposes, I created stickers set for my two protagonists and I also made photo cards for all three characters. I also included a "Draw Your Own Expression" for people to draw their expressions.

figure 5.5 Mayari Photocard

figure 5.6 Apolaki Photocard

figure 5.7 Bakunawa Photocard


figure 5.8 Sticker Set

figure 5.9 Draw Your Own Expression
We had our final presentation on Week 15 and I got some feedback:
- The font looks more like a military theme
- Do color correction for the characters and weapons so they pop up more, or can just change the background color to something like grey
- Make Mayari more glorious on the book cover
- The environment animation is too subtle
- Add effects to Mayari's weapon
- Mayari's character introduction animation is too long
- Finish up what is need to be revised and try to make 3D of the characters if possible in the remaining time, you can make the 3D in the half body too.
From the feedback, I fixed everything that needs to be fixed and all of them can be found in the final artbook of RECALLIA.
figutre 7.1 Final Artbook
REFLECTION
At the beginning of the semester, I was very excited about this module. However, after everything, I must say that this module is tough. I was excited because I could use this chance to create a physical outcome of my illustrations. But, it was very tiring and stressful. I feel like the amount of work I put into this project is more than what I used to, I even reached a record of sleeping at 7AM. Although it is tiring, I also enjoyed it! The journey has been fun and tough, I wouldn't make it if it's not because of my family, friends, and the lecturers. Thank you for all the support!

Comments
Post a Comment